The Perfect Neapolitan Pizza
Authentic Neapolitan pizza dough recipe (Biga method)
⏱️ Preparation time:
30 minutes active
(Total rising and fermentation time: 24 to 48 h.)
👥 Number of people:
4 people
👨🍳 Level:
Advanced / Artisan
(Masterclass)
👨🍳 Cuisine:
Neapolitan / Italian
👨🍳 Cooking technique:
Biga method / Cold fermentation
👨🍳 Ingredient authority:
Type 00 / Manitoba
Forget everything you know about quick pizza dough from a packet.
Real Neapolitan pizza is not a recipe;
it is pure alchemy. It is a game between time, temperature, and living organisms.
If you have ever been to Naples, you know that smell: deep, slightly sour, complex, and irresistible. The crust puffs up in the oven into a cloud of air bubbles, marked by the iconic black leopard spots.
How do you recreate that at home? Not with mountains of yeast, but with the secret of the Italian masters: The 100% Biga method. This is not a rush job. This is the ultimate 24-hour masterpiece for connoisseurs.
This recipe is calculated for 4 perfect dough balls of approximately 250 grams. This is a recipe with exact baker's percentages. Grab your precision scale, roll up your sleeves, and here we go. The Holy Measurements No estimates. No splashes by eye. We work with exact baker's percentages for the perfect pizza bases.
🛒 What do you need? (Ingredients)
- 600 grams 'Manitoba' Flour
- Choose flour with at least 12.5% to 13% protein; essential for the gluten network
- 390 ml Water
- This brings the total hydration to 65%: the sweet spot for a crispy yet airy crust
- 18 grams Fine Sea Salt
- For the flavour and the essential firmness of the dough
- 1.5 grams Dried Yeast
- Yes, that little. Time does the rest
👨🍳 The Preparation (Step-by-step)
The Birth of the Biga (24 or 48 hours in advance) You start one or two days earlier. Here we lay the foundation for that explosive, aromatic crust. Here we teach you the professional cold fermentation technique
The Biga Ingredients:
- 500 grams of your Manitoba (We start directly with the bulk!)
- 225 ml Cold Water (This is exactly 45% hydration – don’t be alarmed, it should be bone dry)
- 1.5 grams Dried Yeast [1, 2]
The Preparation:
- Do not knead, but crumble!
- Put the 500 grams flour in a large bowl and sprinkle in the yeast. Pour the cold water over it. Mix with your hands so that it all becomes broken.
- The secret of the master:
- Kneading is now strictly forbidden! Make your hand into a claw and loosely go through the bowl. You only want to mix the flour and water into a coarse, incoherent, crumbly mass. It should look like thick bread crumbs or pieces of raw dough.
- The logic:
- If you start kneading now, you develop gluten and lock everything in. We actually want the yeast to have all the space to take in oxygen and breathe.
- The rest:
- Place these loose chunks in a bowl, cover it (leave a gap open / use a pinhole opening so the gas can escape) and let this rest for 16 to 24 hours (or up to 48 hours for even more depth of flavour) in a cool place (ideally 16-18°C, or simply in the vegetable drawer of the fridge).
The next morning:
Pull off the lid. Do you smell that insane, slightly fruity, alcoholic aroma? Has the dry mass turned into a sponge full of tiny air bubbles?
Congratulations. You have just created your own flavour bomb.
STEP 2: The Final Dough & The Great Collaboration
Now we bring the elements together into one super dough.
The final ingredients:
- The remaining 100 grams of Manitoba
- The remaining 165 ml Ice Cold Water (The water must be ice cold to compensate for the friction of kneading)
- 18 grams Fine Sea Salt
The Preparation:
- Breaking down for building:
- Take your ripe Biga and tear it into small pieces with your hands. Throw these pieces into your mixing bowl or food processor.
- The absorption:
- Add the remaining 100 grams of flour and pour in three-quarters of the ice-cold water. Start mixing gently. Squeeze the pieces of biga in the water with your hands until the moisture turns milky white and the biga starts to absorb the water.
- The timing of the salt:
- As soon as the dough has a rough consistency, sprinkle in the 18 grams of sea salt. (Why only now? Salt draws out moisture and kills yeast cells on direct contact. We are protecting our hard workers!) This is an essential technique in professional pizza dough making.
- The transformation:
- Add the last drops of water very slowly while continuing to knead intensively. Keep kneading (with the machine or by hand) until the dough leaves the sides of the bowl completely clean. What remains is a silky soft, shiny, elastic superball that feels like a baby's skin.
STEP 3: The Kneading (The Workout)
- Dump the dough onto a clean work surface. From now on, do not use any extra flour, no matter how tempting! Extra flour changes the hydration ratio and makes your dough heavy.
- Push the dough firmly away from you with the palm of your hand, fold it back, and turn it a quarter turn.
- Repeat this for 10 to 15 minutes. You will feel the structure change under your hands.
- The ultimate test: Press a dimple into the dough with your finger. Does the dough spring back immediately and vigorously? Then the gluten is perfectly developed and ready to hold the air bubbles.
STEP 4: The First Rest (Bulk Fermentation)
- Form a nice, tight large ball of dough.
- Place the dough ball in a lightly greased olive oil bowl and cover it airtight with a lid or cling film.
- Let the dough rest for 2 hours at room temperature. The yeast warms up and begins to produce gas at a steady pace.
STEP 5: The 24-Hour Hibernation (Cold Fermentation)
- Now place the bowl directly in the fridge (around 4°C) for at least 24 hours.
- The science behind it: In the cold, the yeast almost goes to sleep, causing the dough not to rise. But the enzymes in the flour keep partying! They break down the complex starch chains into sugars. This process creates that deep, characteristic flavour development that you can never match with a quick rise. Moreover, the dough becomes feather-light and extremely easy to digest; no feeling of fullness afterwards!
STEP 6: Making the Balls (The Big Day)
- Take your fermented dough out of the fridge after 24 to 48 hours
- Carefully turn the dough out onto your work surface and divide it with a sharp dough cutter into 4 equal pieces of exactly 250 grams.
- Creating tension: Fold the edges of each piece of dough towards the centre so that there is quite a bit of tension on the top. Then roll the ball with a cupped palm in a circular motion over the work surface until you have a perfectly smooth, tight dough ball.
- Place these balls in a sealed dough box (or on a deep plate under cling film) with enough space in between, as they will still grow!
STEP 7: The Final Rise:
- Let the dough balls now come to room temperature and rise for 3 to 4 hours.
- The balls will relax, become softer, and fill with beautiful, delicate air bubbles.
When you later press your fingers into the dough to shape the pizza, you will feel the perfection. The air willingly moves to the edges. Your dough does not tear, does not shrink back, and is ready for the sauce dance.
This is how a real pizza base should be. Top it to your liking.
🍕 From Masterful Base to Culinary Masterpiece
You have shown patience, worked with baker's percentages, given the Biga the love it deserves, and transformed the dough into a velvety, elastic ball with a perfect gluten network. You are about to bake a pizza that can rival the best pizzerias in Naples in terms of texture, flavour, and digestibility.
But a sublime base demands respect in the form of toppings. Forget mass production; the magic lies in the simplicity and power of authentic local products. Once your dough transforms in the blazing hot oven (or on your pizza stone) into a cloud of air bubbles with those iconic leopard spots, it’s time for the finishing touches.
Let yourself be inspired by our favourite Italian classics to dress your perfect base:
[Pizza Margherita: The Holy Trinity]
The ultimate test for any pizzaiolo. Simplicity at its finest: a velvety sauce made from San Marzano DOP tomatoes, creamy Fior di Latte (or hand-torn buffalo mozzarella), a few leaves of fresh basil, and a drizzle of extra virgin olive oil.
[Pizza Diavola Superiore: The Fiery Character]
For those who love spice and depth. Cover the base with tomato sauce, Fior di Latte, and generously top it with spicy Spianata Romana and spoonfuls of artisanal 'Nduja from Calabria. Bake it and then drizzle a drop of chili oil over it afterwards.
[Pizza Bianca con Tartufo e Funghi: The Art of the White Pizza]
No tomato sauce, but pure luxury. Spread the base with a rich summer truffle cream, top with Fior di Latte, thin slices of sautéed wild mushrooms, and fresh rosemary. Finish after baking with freshly grated Parmigiano Reggiano and shavings of black truffle.
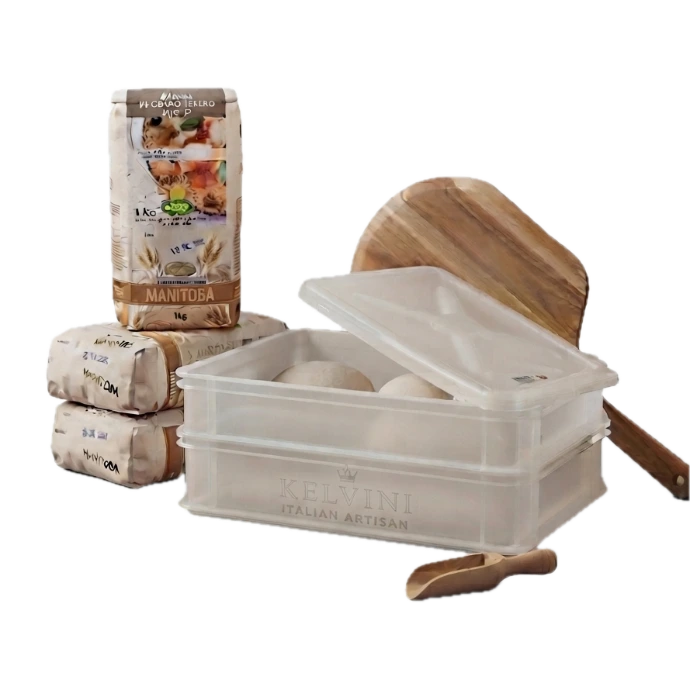
🇮🇹 Make this recipe with the real ingredients from Campania:
Use authentic ingredients directly from our producers for the best results:
✍️ Dive deeper into Italian cuisine:
🧀 The perfect Melt:
Why regular mozzarella makes your pizza soggy [and how to use real Fior di Latte or Mozzarella di Bufala].
🍅 The San Marzano Legend:
Discover why authentic Neapolitan pizza sauce consists of only three ingredients [Read the story of the volcanic tomato].
💡 The "Secrets of the Piazzola" Tip:
Pay attention to the temperature of your water, not just the clock!
When kneading a high-hydration dough (65%), friction and heat are generated. Use ice-cold water from the fridge for the final dough in summer. If your dough gets warmer than 24°C while kneading, the gluten structure is damaged and you lose the airy crust.
Receive the recipe in your mailbox
Leave your details here and get it directly in your mailbox